Showing posts with label Perle Cotton. Show all posts

Tuesday, April 26, 2016

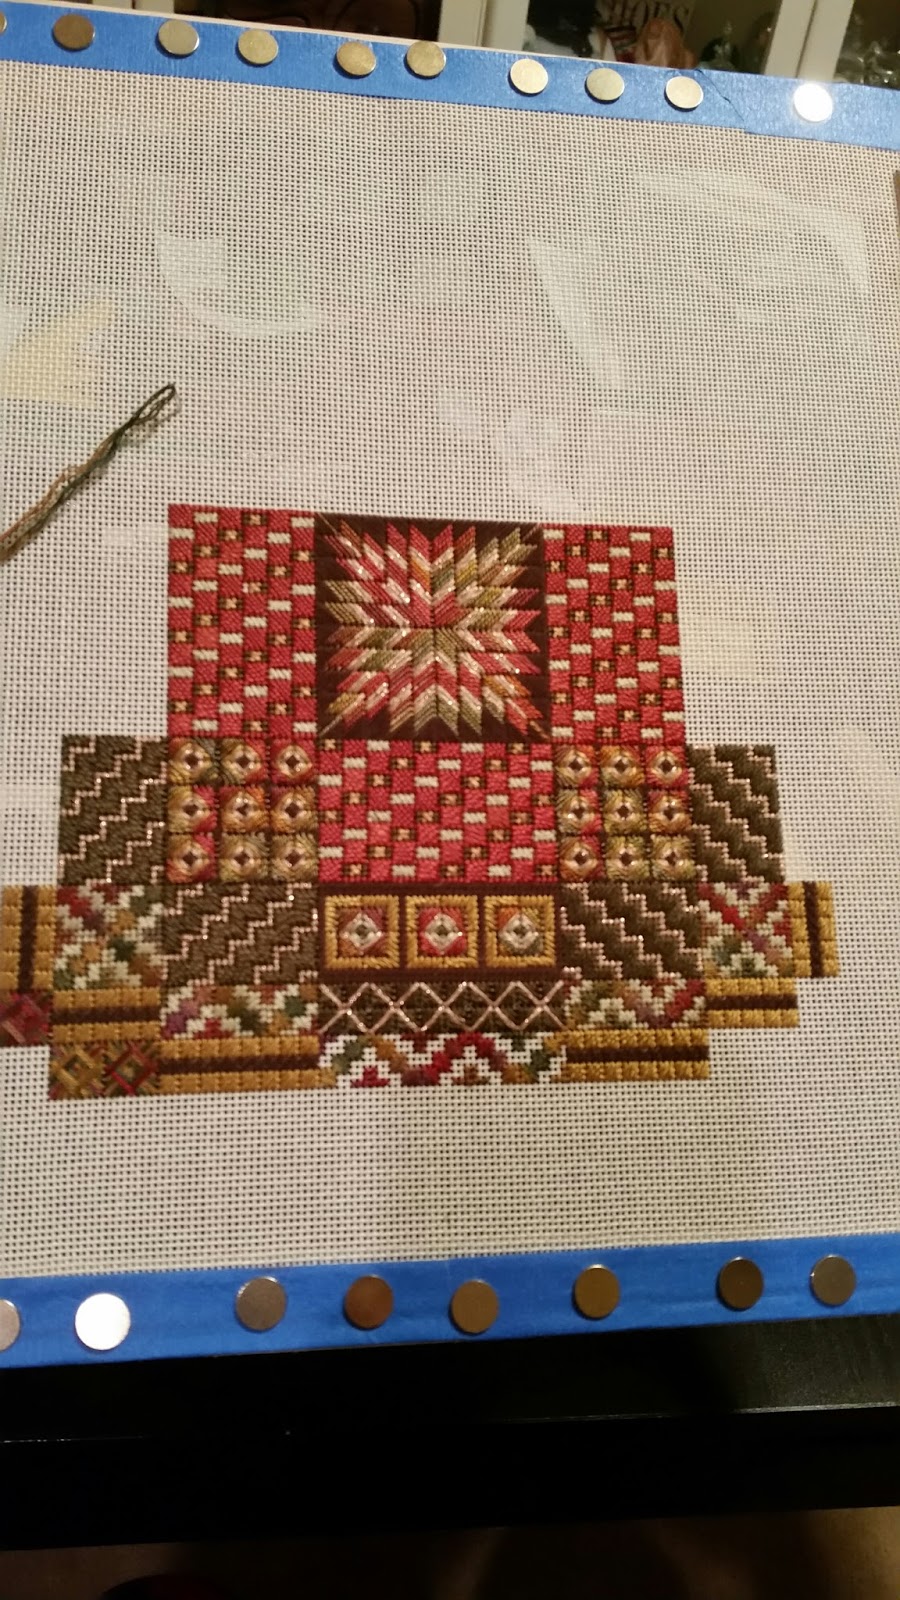
Mint with a Twist is finished...........................It's a stitching miracle, I finished the design in two days.  It helps that I had already stitched this design once so I was familiar with it and I didn't choose any cotton floss or stranded silk so no laying of threads.

Hopefully you can see how I rotated the orange square 180 degrees to create a different design.  The last row of the design is a series of small squares and even with two sections rotated you can follow the small squares all around the design.

 
I really like the contrast of the orange colors I choose. The camera washes out how vibrant the oranges really are.

 
In hindsight I wish I had chosen a Perle Cotton that had more contrast, the camera picks up on the pinks but in person the red squares are really red.  The pinks don't show as much in person.

 
Next project is another one of Kathy Rees' designs called Cobalt.  Tune in tomorrow for a look at the progress.

Monday, April 11, 2016

Hide N Seek progress.....................I have more progress on Hide N Seek to show.  The laying of the Cotton floss is very time consuming, if I had been thinking I would have substituted Perle Cotton for all the Cotton floss and would be able to really jam through the project.

I'm always excited to start a new project and then I want to finish it so I can get to the next one.  Having so many counted canvas designs kitted up and waiting I could stitch the next couple of years without having to buy anything, not likely to happen.  Just recently I got 3 Dakota Rogers designs that will really be interesting to stitch.  Once Hide N Seek is finished I might pull thread for one of the Dakota Rogers designs, they're really different from what I usually stitch.


Saturday, April 9, 2016

Hide N Seek has begun.....................This is the start of the new project Hide N Seek by Laura J. Perin.  The design calls for several different colors of Cotton Floss which have to be layed.  Because I have to lay the stitches my progress is much slower so I will not post every day as I will not have as much to show.  I usually stitch fairly quickly however laying stitches slows me down and as a result the progress I show you is not that much each day.  Posting every other day for the duration of this project will hopefully show more progress and keep you from getting bored.

The very center is stitched with Caron Watercolour Cranberry and the green is Perle Cotton.  The two shades of orange are floss and that is what takes the longest to stitch.

Thursday, April 7, 2016

Mystery Class - Area 6.............Area 6 is now finished and that's the end of the first lesson.  The center of the design is stitched with Vineyard Silk and Very Petite Velvet.  The contrast of threads looks really good in person, gives nice texture.  Well that's all for this month, I have to wait to May 1st for Lesson 2.

 
The new project is Color Study:  Hide N Seek by Laura J. Perin.  I received this pattern for Christmas 2014 so it's about time to stitch it.  I am drawn to earthtones and also bright colors, not so much the cooler color palettes.

 
Hide N Seek is stitched with a variety of Cotton Floss, Perle Cotton and 1 Caron Watercolour.  I spent my stitching time today cutting a piece of canvas, taping the edges, marking the center and mounting it on a frame.  Next I wound the floss on cardboard bobbins to prepare for stitching.  I always prepare the threads before starting a project.  The Watercolour and Perle Cotton skeins were cut and threaded onto Twitchetts then put on a binder ring.  This just helps organize the threads and keeps them from becoming a mess.


Tuesday, April 5, 2016

Area 4, 5 and 6..................I finished Area 4, the center thread does not contrast very much with the one on either side.  The overdyed color is subtle so it doesn't really stand out.  Some of the other colorways show more contrast.

 
Area 5 is a disappointment, the border is stitched with Perle cotton and Vineyard Silk however they are almost the same color so you can't tell they are different threads.  The center of the design is Waterlilies Silk and again the color is almost the same as the border.  Other colorways show a real contrast between the border and center.  Once the design is finished I will probably go and rip out the center design and replace it with something else in a contrasting color.


I began Area 6 today and is a border of Rhodes stitches in Gloriana Princess Perle Silk.  Princess Perle is a challenge to work with as it is very springy and at times seems alive.  Once you cut into the skein look out because it is all over the place.  I had a tangled mess to unravel and then cut into 1 yard lengths.  The color variation in the thread is very subtle so you really don't notice the color change.


If all goes to plan I will finish Area 6 tomorrow and then wait until May 1st for the next lesson and patterns.  The waiting is going to be difficult.  In the mean time I will start a new project, the question is what.  I'll get out all the kitted designs and see what inspires me or I may create my own design.  Tune in on Thursday to see what I've selected.

Sunday, April 3, 2016

Mystery Class - First Lesson.........................The long awaited moment has arrived and the first lesson of the mystery class is available.  There are 35 areas in the design and each one has a different pattern.  The first photo shows my progress so far.


This is Area 1 which is stitched with a Watercolours borders that includes Very Petite Velvet crosses in the center of the boxes.  The center design is stitched in Vineyard silks, which of by the way are a joy to stitch with.

 
Area 2 has an interesting border of long arm crosses that when stitched looks like a woven braid, it is in Watercolours.  The center design is Vineyard Silk and Frosty Rays.
 

Area 3 is only a striped border so far, it is stitched in Vineyard Silks.  The center section is included in another lesson.  Kathy did indicate that the main design in this area is a Walneto stitch.


This photo is Area 4 which is still in progress.  The border is stitched in Watercolours and the lattice background is stitched with Petite Sparkle Rays.  The center section is stitched in Vineyard Silks and Watercolours.
 
  Lesson 1 includes Areas 5 and 6 also which I will work on and should be finished by Wednesday.
 

Friday, April 1, 2016

Curios Mystery Class has begun.........It's April 1st and the first lesson for the Shining Needles Society Mystery Class is now available.  I thought I would show the 25 threads that are used in the project.

 
This photo shows all the threads, Caron Watercolours, Vineyard Silk, Gloriana Silks, Waterlilies, Perle Cotton, and an assortment of Rainbow Gallery threads.


This photo shows Petite Very Velvet, Silk Lame Braid, Frosty Rays, Neon Rays, Petite Sparkle Rays, Spendors and Sparkling Neon Rays.  A total of 10 different Rainbow Gallery threads.


Here are 2 Perle Cottons, 1 Gloriana Silk Princess Perle, 1 Gloriana Duchess Silk and 1 Waterlilies.


These are the Caron Watercolours, Prickly Pear, Turmeric, Seaweed, Willow and Chardonnay.

 
Now are the Vineyard Silks.


This shot shows all the skeins opened and sorted on Twitchetts.  Twitchetts are the best for any stitching project.  It is so easy to sort, separate and handle your threads.  Can you tell I love them.  You can find Twitchetts on Terry's Dryden's website, try them and you will be hooked.  Tomorrow I will show the start of the design for this month.

Saturday, March 5, 2016

Finished!!!.....The stitching is all done, the canvas cut apart and mounted in the shadowbox.  The design I took all the inspiration and designs from is Earth from the Elements series.  The Elements series is designed by Kathy Rees of Needle Delights for Tomorrow's Heirlooms counted canvas club.

Here are all the design elements I stitched. 

 
Here I have remove the canvas from the stretcher bar and cut the canvas apart.
 
 
I have cut mat board for each design element and getting ready for the hot glue.  Ok the hot glue is absolutely no fun and my fingers are raw from that experience. 


Once all the design elements were mounted on mat board I arranged them and adhered them in place. 
 

This photo shows the pieces mounted and adhered and I was trying to show the different depths of the pieces.  Not sure I really captured it successfully.


This photo has the background attached to the shadowbox, the glare from the glass is a real problem when trying to get a decent photo. 


The end result it really about what I wanted it is just difficult to show in a photo all the different heights of the individual pieces.
 
 
What's next?  How about Tangerine Twist from my favorite designer Kathy Rees.  I went to my local needlepoint shop, Needle Nook of La Jolla, and pulled all the threads for the design.
 

Thursday, March 3, 2016

Almost done stitching.......Or I should say hopefully I am almost done stitching the design elements for the shadowbox design.  I think the green rectangle is the last piece before cutting the canvas apart and mounting the individual design elements on board.  My plan is to overlap some of them and have some raised more off the background than others to give a 3-D effect.  Nothing ventured, nothing gained so if this does not come out as I see it in my mind at least I tried.


Monday, February 29, 2016

More progress......I have finished stitching a green silk and gold bar and begun a gold and brown bar.  The original design below shows both bars to be shorter but for my shadowbox design they need to be longer.  I also found that the height of the green bar needed to be taller to be proportionate to the space.  I included a photo of the original design showing the green and gold bars.  More stitching tomorrow.


Saturday, February 27, 2016

Lone Star is finished......I placed the last stitch and the final order is complete.  This was an easy project to stitch and progressed quickly.


I will begin the shadow box project and see how needlepoint works as an art piece. 

Thursday, February 25, 2016

On the Home Stretch.......Well I've rotated the canvas to the last side and working on the last border.  Looking forward to finishing as I am ready to start a new project.


While stitching Earth from the Elements Series designed by Kathy Rees as a special counted needlepoint club for Tomorrow's Heirlooms I had an idea.  There are parts of the design that can be stitched separately and then put together in a shadow box.  This project will require some finishing work to mount the needlepoint pieces on foam board and then attach them in a, hopefully, artistic way. We can talk more about that when I finish Lone Star.

Wednesday, February 24, 2016

And the progress continues......Today I had to go to the CPA and pick up my income tax returns so I wasn't able to stitch as much as I would have liked.  I finished the border on the second side and will rotate the canvas again in order to finish the last two stars on the third side.  At that point the canvas will be upside down.


Tuesday, February 23, 2016

Lone Star continues...

I rotated the canvas to work on the border on another side.  It is easier for me to rotate the canvas than work sideways.  In some cases I turn the canvas upside down to make stitching easier.  Normally turning the canvas upside is no big deal however when I stitched Around the Rainbow designed by Kathy Rees I had to also read the chart upside down.


This design actually stitches up pretty quickly I started stitching on the 20th and only a couple hours per day.  What will be interesting is to see what project I start when Lone Star is finished.

Sunday, February 21, 2016

The stitching of Lone Star has begun.  I've started with Caron Watercolours #199 for the stars and the background is Perle Cotton #746.  I plan to fill in the other stars with Caron Watercolours #68 and then see what colors look the best.  More updates as the stitching continues.

Friday, February 19, 2016

Now on to a new project.  About 2 years or so ago I stitched Lone Star, designed by Laura J. Perin.  The original color way was very plain and I did not intend to use the specified colors.  I have a stash of Caron Waterscolours on hand at all times and tons of Perle Cotton so I selected my colors.


What I came up with was a very bright palette of yellow, orange and hot pink.  When finished I had the design custom framed with an orange frame and yellow mat.  I loved the end result.  The framed piece was then mailed to my sister in Texas who's comment when she opened it was "It sure is bright".  Not exactly what I was hoping for so lesson learned is know who you are stitching for and select colors they like.


I decided to stitch Lone Star again using a new color palette and this is what I have initially pulled from my stash. As you can see there are 2 different Caron Watercolours and 5 Perle Cottons.


 Let's see if all these are used or if any new colors appear.


Thursday, February 18, 2016

Well the heart design is finished.  The finished size is 4X4 to fit in a standard 8X8 frame.  Here is entire design and then a closeup of each side.


This how the finished design will look with the mat and a simple black frame.  I think my friend will be surprised to find this in her mailbox.